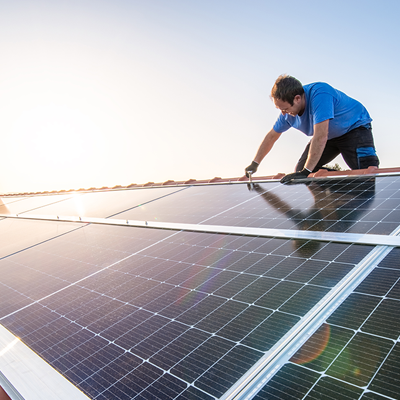
Hey young explorers and crafty parents! Are you ready to dive into a fun project? Today, I’ll show you how to build a DIY solar panel for your game camera. This is a super way to keep your camera running all day long. Using the sun’s energy, we won’t need lots of batteries anymore. Isn’t that cool? Let’s get started!
Understanding Solar Power
Solar power comes from the sun. Solar panels change sunlight into electricity. This electricity can make gadgets work without using normal batteries. We are using solar panels for your game camera. This way, animals will never catch you changing batteries!
Materials Needed
- Solar Panel – This turns sunlight into power.
- Rechargeable Batteries – They store the power for your camera.
- Charge Controller – It makes sure batteries charge safely.
- Battery Holder – Holds your batteries in place.
- Wires – They connect everything together.
- Diodes – These are like one-way streets for electricity.
- Tools – Screwdrivers, wire cutters, and pliers help us build.
All these items can be found at electronics stores or online.
Step-by-Step Guide to Making Your DIY Solar Panel
Step 1: Planning Your System
First, think about how much power your camera needs. Check the camera’s instructions. It will tell you about the power it needs. Choose a solar panel that matches this power.
Step 2: Setting Up The Solar Panel
| Task | Description |
|---|---|
| Place the Solar Panel | Pick a sunny spot so the panel gets lots of light. |
| Mount the Panel | Use brackets to fix the panel to a tree or post. |
Step 3: Wiring Your Solar Panel
This is where grown-ups might need to help. You must connect wires from the solar panel to the charge controller. Then, connect wires from the controller to the battery holder. Always be safe with wires!
Step 4: Adding Safety With Diodes
Diodes stop power from going the wrong way. They keep your batteries safe. Place a diode on the negative wire from the solar panel.
Step 5: Connecting Rechargeable Batteries
Pop your batteries into the holder. Connect the holder to the charge controller. Now the sun can charge the batteries!
Step 6: Connect Your Game Camera
Finally, you connect your camera to the battery holder. Now, it will use the power from your solar panel. No more regular battery changes!
Troubleshooting
- If it’s not working, double-check connections.
- Make sure the solar panel gets light and is not in the shade.
- Test your batteries to see if they need a charge.
Maintaining Your DIY Solar Panel
Clean your solar panel to keep it working well. Check wires and connections too. This makes sure everything is safe and working. Always take care of electronic things with care.

Credit: www.newyorker.com
Benefits of a Solar-Powered Game Camera
- Helps the Planet: Using the sun’s power is good for Earth.
- Saves Money: No need to buy lots of batteries.
- More Fun: Spend more time watching animals, less time fixing the camera.
Conclusion
You did it! You’ve built a cool solar panel for your game camera. Now, your camera will click pictures of animals day and night. You’ll see what they do when humans are not around. Always remember to be safe when working with electronics and ask for help if you need it.
If you liked this project, share this guide with your friends! Maybe they would like to power their gadgets with the sun too.

